When creating an immersive 360-degree video experience, the audio production is every bit as important as the visuals. In order to feel completely immersed in the video, it is absolutely vital that the sounds we hear are coming from the right direction.
To really feel like you’re there and part of the action, when you move your head in one direction or another, the audio should change to reflect that movement. The way to achieve this is to record what’s called “Ambisonics” audio – a kind of “surround sound”.
What is Ambisonics audio production?
Ambisonics isn’t new, it was developed in the 1970s but hasn’t gained much traction or attention until very recently, thanks to the rise of virtual reality and 360-degree videos.
Ambisonics – also known as spatial audio, 360 audio, VR audio, or 3D audio – is a full-sphere surround sound technique which uses multiple microphones to record four or more audio channels. These audio channels can be manipulated during playback to give the impression that the audio source is moving around you.
Imagine you are watching a 360 video and to your left there’s a water fountain and to your right there’s a person talking. You would expect to hear the fountain more in your left ear and the person more in your right ear.
Now what would you expect to happen if you turned around? You would expect to both see and hear the fountain on your right now, wouldn’t you? This will only happen if your 360-degree video is produced with Ambisonics audio. If your video is just using traditional stereo audio, it won’t react at all to whichever direction you’re facing.

While watching a 360 video the viewer can be looking in any direction at any time.
If you need to direct the attention of the viewer towards a specific point of interest, you can use Ambisonics audio in conjunction with visual cues to guide the user’s gaze to where you need them to look.
Humans are very good at detecting what direction a sound is coming from, so using Ambisonics can help give the viewer a sense of where they should be looking.
How to perfect Ambisonics audio production on 360 videos
So, how can you get Ambisonics audio for your 360 video?
Use a separate audio recording device
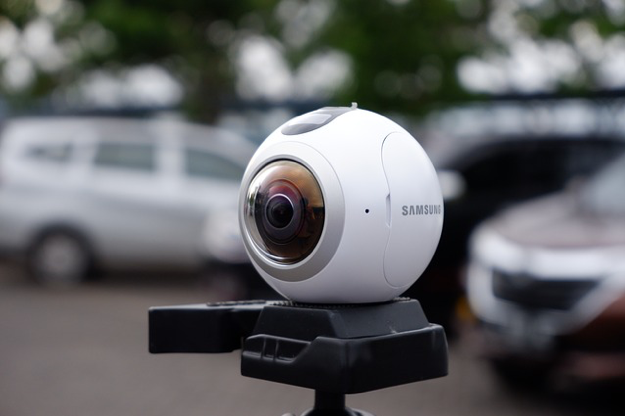
While most 360 cameras on the market offer an in-built way to capture Ambisonics audio, you’ll want to use a separate audio recording device to get the best results. We use the insta360 Pro camera, which has four in-built microphones with the capability to record Ambisonics audio (if the setting has been enabled).
However, there’s a problem: these microphones don’t have any protection from wind and the insta360 Pro device can get quite loud while its fans are running. There is an option to stop the fans during recording, but this can lead to issues if you are filming in a warm environment.

FURTHER READING: 5 reasons you should start embracing 360 video
We recommend using the Zoom H2n to record the Ambisonics audio for your 360-degree video. The H2n is a small, portable recorder which has five microphone capsules on the top and is capable of recording Ambisonics audio, as long as you have the latest firmware update installed.
Synchronise the audio with your video editing software
When using an external recording device to capture audio, you will need to synchronise the audio and video in your video editing software.
If you’re using Premiere Pro, it is as simple as selecting both the audio recorded by the 360 camera and the audio recorded by the separate recording device. Then you right-click, select “Synchronise”, and choose “Audio” as the synchronisation method.
You may also need to pan the audio to correctly align with the video. Premiere Pro has built-in effects to help you preview and align the Ambisonics audio with your video, under the “Special” menu.
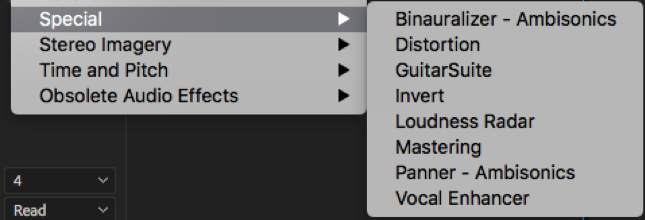
The “Binauralizer – Ambisonics” effect should be applied to the master audio track inside Premiere Pro. It is for preview purposes only. You will need to remove the effect before you hit “Render”.
This effect will allow you to preview what the Ambisonics audio will sound like through your headphones, and allow you to pan around.
Apply the effect to the track
The ‘Panner – Ambisonics’ effect should be applied to the track containing your Ambisonics audio. Correct the pan of your Ambisonics audio to match the starting direction of your video.
If you need more in-depth instructions on using Ambisonics in Premiere Pro, watch this tutorial.
And that’s it really. Premiere Pro has many render presets available to correctly render 360 video with Ambisonics audio for platforms such as YouTube, Facebook, or Vimeo.
If you’re looking for 360 video with Ambisonics in Perth or Western Australia, get in touch with the team at Lush – The Content Agency.
FURTHER READING: 3 tips for choosing the right voice-over artist